Tuesday, January 19, 2010

Bling in the bedroom

Check out the EXTRA FANCY crystal chandelier I finally had installed in our bedroom after having it sit on the guest bed collecting dust for the last 4 months!

Not only is it pretty, but you can actually illuminate the room with a FLICK OF A SWITCH!  It's ridiculous.  Did I mention before how it took me several months of living here before I stopped flicking on the switch-that-did-nothing near our door?  It was madness. 

I used a medallion (have you noticed that I love medallions?) and chose round bulbs to make it look a little more modern.  There are actually more crystals that are supposed to be attached, but I thought it was getting to be a bit much.  It will be so nice to go to bed staring at something pretty instead of open wires every night: 

I wanted to install it myself, but there were tons of wires in the ceiling and no previous fixture, so I had a company come in and take care of it for me.  Good thing, it took him almost two hours to hang this and a light for the art room, so it would've taken me approximately 2 years to put them up.  The chandy weighs 10 lbs and the installer was worried it might be too heavy for the old light box.  He couldn't easily replace the box because (of course) our bedroom's light box is the hub for all the other bedrooms, so that thing was crammed with wires.  He called an expert who assured him that thing wasn't going anywhere.  And hey, it will only crush my feet, not our heads, right?   

I scored the fixture on Overstock.com for $120, which I think is amazing because it is real crystal.  If you purchase this chandelier, you will not be disappointed, this baby looks like a million bucks!

Cost breakdown:
Light fixture from Overstock.com - $120
Ceiling medallion from Home Depot - $19
Installation - $73
Dimmer switch from Home Depot - $13
Total: $225 (less than the price of the chandelier alone at many other stores)

Not having to feel around for the lamp when you walk into the dark room and knock everything you own off the nightstand in the process?  PRICELESS.

Friday, January 15, 2010

What the heck, Target?

I've just confirmed with my friend Katie, the hottest Target Store Manager in Wisconsin, that the amazing Target Home Design Event is not happening in stores this year.  This may be old news to some of you, but I was disappointed and thought I'd share my pain with you all.  She said that last year it didn't sell well until everything went on clearance.  Well, of course!  Everyone waits for the sales, don't they?  Anywho, my need for new home items has the SADS but my wallet has the SMILES about this news.  It is still happening on Target.com, though - so get out there and save 10% on purchases of $100 or more, with free shipping on some of the items, too.  I will just sit this one out as I'm trying to honor my spending resolution.  Boo!   

Thursday, January 14, 2010

A bit of irony

I find it amusing that underneath the wallpaper in the Shining Room, the original paint color closely resembled the pink I had chosen for my ill-fated 'circus nursery'.  Observe:


What a hoot!  (Don't tell anyone, but I do still like this color)

So the walls were in pretty good shape, we just did a bit 'o spackling and a little sanding to get them ready for primer.  However, the wood in the room looked like it had been ridden hard and put away wet.  And it probably had been wet many times since the house was built because there wasn't a storm door for the door to the deck:

Oh wait, there WAS.  It was sitting broken on the deck when we first walked through the house.  HELPFUL. 
There is some significant damage to the floor under the door because of water seepage.  Yeah, I said seepage. 

These poor baseboards haven't seen any TLC (or cleaner, or a broom) in a long time.

Don't worry though, we fixed them all up real nice.  Next post is all about primer!  Titillating!

Wednesday, January 13, 2010

Do not fear the fabric

Let's talk about window treatments.  Mainly, these ones that I made out of my $5 clearance fabric that I had no idea what I'd do with:

I think most people in the house-blog world knows about the Nester and her window mistreatments.  While they are lovely, I generally do not POUF, SWAG, TIE-BACK, FRINGE, or VALANCE my windows and window treatments.  I prefer simple long panels, with only a couple exceptions (like my bathroom).  I thought it couldn't be that hard to make my own simple 'curtain' panels.  I put curtain in quotes because the only thing curtain-like about these is the fact that they hang in front of my windows.  There are no rod pockets, grommets, or stitches in these bad boys.  Here are the steps I took to make them:

Step 1 - Measure that fabric
I laid out the entire length of fabric to make sure I had enough for what I wanted to do.  The lady at the store said 10 yards, but I wanted to be sure.  Max held down the far end for me while I measured.  How sweet. 

I had exactly 30 feet of fabric.  30 feet = 360 inches = four 90 inch panels.  Perfecto!

Step 2 - Cut it up
I measured out my first 90 inch section and cut...

and measured 90 inches and cut...well, you get the idea.  I cut out four 90 inch lengths.


Step 3 - Do Nothing
Ok, that is not an actual step, but that is what I did after I cut everything.  Here are my panels chilling out for a day in the dining room until I finally brought them upstairs:


Step 4 - Develop a deep, meaningful relationship with your iron
When you are unable to sew like me, you use the most wonderful invention ever made - Stitch Witchery!  I got a double pack to have enough to go around all those edges.  Then I used a handy little tool from the fabric store to measure my 'flap' that the iron-on webbing tape would slip into.  The tape I got was 5/8 inches, so I measured the seam all the way down and ironed it flat.  I also ironed the entire panel because no one likes displaying wrinkly curtains on their blog!  TIP - sticking some straight pins right into the ironing board works great for holding down your seam before you iron it. 

I started with the long sides because those were the narrowest hems.  After the fold was created, I slipped the webbing in there and ironed again.  And no fair looking at my dirty bathroom. 

Hoodie hoo!  After taking this picture, I was all excited that I did it!  Then I realized I'd only completed 22 inches out of 1100.  Moving on...

Step 5 - Iron some more
After the long sides were done, I turned everything clockwise and started on the top of the panels.  

Because my fabric was 90 inches long, and my curtains couldn't be longer than 85 inches to fit properly, I knew I would have a lot to hem on the top and bottom.  For the top, I chose 3 inches and measured with my tool all the way down.  Or until I got tired of measuring and just eye-balled it.  Whatever rocks your socks.  

Then I ironed the seam flat, placed the webbing as close to the open end as I could, and ironed again.  You can also leave the short 'sides' open and leave room for a rod if you want a 'pocket,' however I prefer rings for their ease of opening and closing, so I used the webbing on the short sides to make it stiff and hang nicer. 


Step 6 - Measure again before hemming the bottom of the panel!
I say this because I messed up the second one.  I still don't know how, but the second panel was shorter than the first, even though it started out the same length and I thought I'd hemmed the same amount on both ends.  It's a mystery, like socks disppearing in the dryer and the Kardashians getting a tv show.  Either way, I just reheated the webbing and pulled it apart to fix and redo.  Problem solved!

Aaaand, you're done!  Clip your clean-edged fabric rectangle to your rings and then spend a few minutes just pulling them back and forth, admiring your work.  Then go have some wine, because you deserve it!  And then go look throughout your entire house to see what else you can hem or glue together with this amazing stuff! 

Tuesday, January 12, 2010

Replacing a sad light fixture

There was a big snag in my dressing room makeover.  It was this hideous excuse for a light fixture:

I had initially thought I could use it underneath the lovely White Capiz Hanging Pendant from World Market that I scored with a $20 off coupon this fall: 


Then I saw the small hole in the middle of the pendant, and knew that this fixture wouldn't work because the big metal 'neck' wouldn't fit through the teeny hole. 

Denied!  So, I went to Home Depot and bought a $6 'globe base' fixture to replace it.  I've never replaced a light fixture without help, but I really wanted to do this myself for the bragging rights to encourage others to DIY.  If you are interested, here are the steps to my successful switcheroo:

Turn off the power
Or just turn off the light switch, if you like to live on the edge.  No really, don't do that.
 
Unscrew the fugly fixture
This one had little screw caps coated with decades of cooties paint:

They initially didn't want to budge, however they were no match for a pliers and my bodacious biceps! 

It was off in a flash and I could see more fleshy peach/yellow paint.  What is it with this color in old houses??  I can't believe it ever looked good.

There are screws holding the cross bar into the light box, and screws that hold the fixture onto the cross bar.  Here I'm removing the screws that hold the bar into the light box:

Disconnect the existing wiring
Our old house has cloth wrapped wiring and old ceramic wire nuts.  I gave em a turn...


....untwisted the wires.....

And BOOYA!  Old fixture waves goodbye with sad electrical tenticles.  How cringe-worthy.

'To medallion or not to medallion'
Inevitably, you will have ceiling damage and/or paint differences when the old fixture comes down.  You can just patch up your ceiling and repaint, or use one of these guys:

I happened to have this laying around the house, and I thought it would look nice as a bigger fixture 'base' to equal the diameter of the capiz pendant.  Up it went with some painters tape while I attached the new fixture.  Some people use adhesive on medallions, but the fixture itself will hold it on, so I don't bother with it.

Here is my new fixture, a 4 inch globe base. I planned to use the three small holes that are meant for attaching the globe to hang the pendant with wire.  And paint out the black.

Attach the new fixture
Here is where you would usually screw in the new fixture cross bar, however my old cloth-wrapped wiring wouldn't stretch far enough to come down the few inches needed to attach in this manner, so I connected the wiring first and then stuffed it up into the ceiling.  Eh, you work with what you got.  I just twisted the wires together and used some new wire nuts to connect them fully. 

The cross bar/mounting strap gets screwed on to the light box.  Wrap your grounding wire around a screw. 

Follow the directions on your fixture for how it gets attached to the mounting strap.  This one had a twist and lock mechanism.  After tightening up the screws a tad, I jumped off the ladder to survey whether the medallion was straight before tightening fully. 

Good enough, people!  I tested the fixture (of course it worked without incident because I'm awesome) then I stuffed some kleenex in the receptacle, hit the entire thing with some glossy white Rustoleum 'Universal' spray paint, touched up the ceiling with flat paint, and saw this fresh and clean result:

The next step was to get some picture wire to attach the capiz pendant to the fixture.  Shaun held up the pendant while I wrapped the wire.  Did I do a beautiful job?

Heck, no.  But no one will notice the wire, and it is a strong hold.  And my arms hurt.  After a successful attachment, I spent the next 15 minutes unwrapping all the shells.

All the work was worth it in the end, I'm in LOVE with this light!

As are all the other bloggers who have the same type of pendant light...Chris, Freckles Chick, Rebecca, and of course John and Sherry.  What can I say, dozens of bloggers can't be wrong about this beautiful fixture!  It helped me take my room from this ho-hum space:

To this fit-for-a-princess primping spot:

I hope this post has inspired you to tackle the ugly lights in your life!  And thank you all so much for your wonderful comments about my new favorite room of the house! 

Monday, January 11, 2010

Dressing room is done!

It's finally finished, peeps.  I will try to keep the commentary to a minimum, since I know you just want to see the PICTURES!  There are tons in this post, so without further ado, let me show you the finished room! 
This room makes me DIE of happiness and use an abnormal amount of exclamation points!  I knew I wanted open clothes storage in this room because I have so many colorful and beautiful clothes, I felt they needed to be seen.  So, we went to Ikea the day after Christmas (in a blizzard) to purchase three TJUSIG hat racks and two SMADAL bookcases to use for clothes storage instead of their intended purposes.  I love the way they look all together, and I also love the way the wicker baskets on top tie in the dresser!
I have determined I have a cardigan sweater in every color of the rainbow.  How embarrassing.  And awesome.  Embarrassing, yet awesome.   
Clothes that don't fit me right now Overflow clothes and shoes are in the closet:
I used a low rack we had laying around for boots under my pants and skirts, it also does a good job of concealing the ugly plumbing access doors.  And it was free.  Muahahahaha!
I love this picture because all the clothes are 'framed' by the mirror above the dresser.  They are like art!  Exclamation point!
Because I wanted to be more proactive about picking out my outfits the night before instead of trying on everything I own at 7:45 am and being late to work (again), I installed a robe hook near the closet door to hang said outfit.  I bought this dress long before I had picked colors for this room.  Isn't it funny how you can get inspiration for your home decor from your wardrobe?  I found I have lots of gray/yellow clothes as I was putting stuff away.
This is a Pier 1 bench my wonderful mom bought for me last Christmas.  It absolutely looks divine in here!  I love that I can sit on either side and put on my socks and shoes now that it's not shoved against the window.  I also won't let it be as much of a 'catchall' because it is the focal point of the room.  I think.  Maybe the clothes are?  Or the light?  Whatever!
The leaning mirror was part of a big mirrored closet (identical to the one in the guest room) we tore out of the master bedroom when we moved in.  The mirrored doors had been chillin in the basement since then, and I was wracking my brain trying to think of how I could afford a huge mirror for this room.  DUH!  The epiphany hit me one day, and all I did was spray paint the metal frame white and call it a day.  I could put moldings on the metal one day, but for now it works just fine.  And it was FREE!  Muahahaha!
My favorite part of the room is a tie between the capiz pendant and THE RUG.  It is so lovely.  It almost makes me glad that the Rugs USA bullcrap happened.  I've had my eye on the 'Pineapple' PB Moorish Tile rug since it came out, but never saw where a yellow rug would fit into my home.  When I saw that this 8x10 bad boy was on ebay for almost half of the retail price, I had to jump on it or forever regret it.  I love that it almost covers the entire floor, it's like really swanky carpeting.  It is so nice to have warm feet in the morning, and the price is more than justified by the daily use this rug will get!
My curtains also turned out pretty good, huh?  I just finished all the edges with iron-on hemming tape and hung the panels with clips.  They were easy, yet extremely time-consuming.  I personally love ring clips for curtains because they slide easier, so I will definitely be doing this trick again!
I will have more posts this week about the lighting installation and the curtains.  I did spend a chunk on this room, but half the total was the rug....and I wouldn't change a thing.  Except the stupid Behr color-matched paint, that was a big mistake.  I know you want all the dirty details, so here ya go from most expensive to least expensive:

Room breakdown
8x10 Pottery Barn Moorish Tile rug - $400 (including shipping from ebay - a great deal!)
Ikea Smadal Bookcases (2) - $140
Ikea Tjusig Hat Racks (3) - $90
World Market Capiz Pendant - $50 with coupon
Paint - $50 (Benjamin Moore Coventry Gray $33, ooops Behr color-matched gallon $17)
Pier 1 Bench Cushion - $48 with coupon
Pier 1 Baskets (4) - $20 on clearance
Gray Target Pillows (2) - $19 on clearance
Curtains - $10 ($5 for clearance fabric and $5 for Stitch Witchery)
Replacement Light Fixture - $6
Pier 1 Bench - FREE (I think mom paid $160 for this, a gift for me last xmas)
Leaning mirror - FREE (used to be a closet door from master bedroom!)
Total: $833.00 - Still less than 'Design on a Dime' and much better looking, in my opinion!


Things I had already, and what I THINK I paid:
Ceiling Medallion purchased a year ago - $10
Pier 1 Dresser purchased 7 years ago (I AM SO OLD!) - $350
Pier 1 Mirror also purchased 7 years ago - $80
Gray Primer purchased a year ago - $15
Bed Bath and Beyond Hangers and clips purchased over the course of the summer ~$70
TJ Maxx Crystal Lamp purchased 6 months ago - $30
Clothing purchased almost everyday of my adult life - $1,000,000
Total if you include everything but the clothes - $1,388.00.  Still less than most of the 6-drawer dressers from Pottery Barn!

Oh yes, and here is the before-before (from when we did a walk-through):
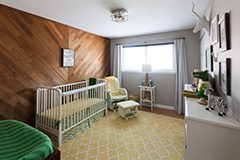
And the Britney-Spears-circus-nursery OOPSIE before:
You can probably understand my happiness with this room after seeing these!