Tuesday, December 17, 2013

Our basement family room

So, where did I leave off with the family room?  I believe I showed you the new can lights, and that is about it.  Well, let me give you the full tour.  One good thing about taking a two month blog break is that when I come back you can see before and after all at once, right?  No dragging things out for weeks around here!  Here is the basement when we bought the house.  Gross.  A previous owner ran a business as a lawyer out of this room, I don't think I would've hired him after meeting here.  
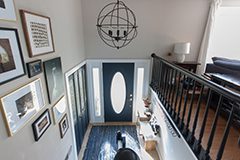
The stairs coming down.  Forgive me, I have no idea what I was doing with this camera angle.  I must have been high on outdoor carpet glue.  
This lovely wood all used to be painted an awful green, you can still see the color in the nail holes - thankfully someone before us refinished it all!  Here is when we ripped out the stanky carpet and crapped up the basement with junk.  It stayed like this for years.
Then we ripped all the weird walls down, we still have no idea what sort of material they were made of.  And of course, the ceiling came out - a layer of drywall covered with a layer of thick tiles.  Our awesome electrician put in the can lights. 
We found a fabulous drywall guy on Craigslist who put up all the sheetrock for $500.  And we had to do none work ourselves, he used all the existing 'studs' even though they didn't seem useable.  Shows what we know, we should've done this project years ago.
The mudding happened...
Then I finally got to paint!  We used Glidden's Ceiling Paint on the ceiling and walls (no primer, on the advice of our drywall guy) and it sucked.  The 'white' paint looked GRAY. Do not buy Glidden white!
The walls were painted Behr Harbor Sky to give it a little color.  The fireplace bricks were repainted in Behr Ultra Pure White in satin.  We added trim to the doorways and crown molding across the fireplace wall.  

I just bought cheap pine trim and used a couple different stains until it matched up pretty well.  American Walnut topped with Gunstock was the magic combo.  I'm happy with it!  
We also cleaned up the gross windows/wells and I hung curtains on tension rods since regular rods wouldn't work.
We decided to just paint the concrete floors for now, it looks fine and while we have cats that poop, pee and puke, there is no carpeting going in this room.  We used the same color all throughout the basement, and we went right over the swirls of old carpet adhesive....Behr Epoxy floor paint in 'Spanish Parador.'
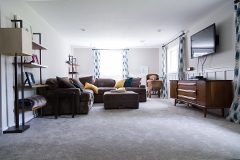
Here is the finished room!
I used my beloved Howard products on all the wood, and it looks great. 
Don't you love my mom's trippy settee and chair?  They are sweet antiques on loan because we don't have any furniture for this room.  Except the bookcases that used to house my clothes in the dressing room...oh yes, many things have happened in the last two months!  More to come on my beloved dressing room later.
I love that this basement already had ceilings over 7 feet, so it doesn't feel like a man cave.  If we put legit flooring in here, it would be perfect.  BTW, that rug is also from Overstock and it has yet to lay flat after a month of being down.  Oh well.  
So what do you think?  Not bad, eh?  Oh, and we didn't do anything but clean the linoleum stairs.  I'm cool with it for now, they are 'funky.'
Yeah, funky.  

Wednesday, December 11, 2013

Our laundry room

I'm kind of on a basement kick, eh?  I'm not sure I've ever shared our laundry room on the blog before....well, here it is.  
Ok, that is what this room looked like when we bought the house.  Flesh colored walls, weird phone, bright yellow painted pipes, ductwork and floor joists up top...
WHY?  But the real winner of this space was the horror-show floor.  It looked like some black rubber mats were thrown over a crime scene.  The red paint under those mats was still WET.  We got the mats up, let the room dry out, then took some scrapers and got to work on all the loose and flaking paint on this floor.  
There was green, red, gray, tan, every shade.  After painting the cinderblock walls white and the paneling aqua, we scraped all the yellow paint off the joists and ruined our necks in the process.  Then we scraped and sanded the floor until we felt comfy going over the it again with Behr Epoxy floor paint in Spanish Parador.  This all happened in 2008, right before we got our new piece of crap washer and dryer. 
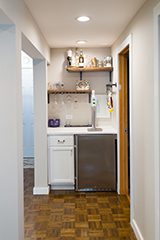
The laundry room sat like that, looking 'acceptable' for years.  Then I finally decided to pretty it up.  Here is what that mishmash counter area looked like in early November....
And here is what it looks like after a couple coats of Rustoleum Oil Base White paint. That stuff is MAGIC!  I'd used it before with great results on our IKEA desk, and had great results again. Yes, it is still sticky and stanky.      
To cover the break where the old metal cabinets and the awkward countertop meet, I hung up this old bathroom hook thingy that my mom gave me years ago.  It was free, and fits perfectly!  Plus, it's great for hanging stuff to dry.  Mostly bras.  Yep, it's pretty much a bra drying rack.
I spent $45 on a new indoor outdoor rug from Overstock that looked pretty and happy, and I'm extremely glad I did.  It doesn't seem outdoor like, or plastic.  It is so nice!
I also made some little curtains for the gross windows using leftover fabric from upstairs projects, dowels and dowel caps from Hobby Lobby.  The entire project cost me $3 and really makes a difference.  Here is the finished laundry room today! 
I am so proud that I was able to make it look like this with some paint, some elbow grease, some cheap fabric, and a new rug.  We can't all have beautiful new cabinetry, tile, windows, etc...but even a crappy space like ours can look cute!  
I'm all about making the best of what I've got these days, so this project makes me feel good.  Now if only I could devise a way to have other people do my laundry for me.

PS - turns out I did share the 'old' laundry room before, back when I was much funnier at the start of my blogging journey, read it here!  I love seeing how my description of the room changed from then til now.  Ah, 2009 me...you were awesome.  

Friday, December 6, 2013

Our basement outhouse

We have a weird toilet room in our basement.  I know it's not uncommon, but it still always freaked me out and I never went in there, even though the toilet is pretty new and it works fine.  A couple weeks ago I decided to fix it up on a random week night.  
The 'room' is really just some wood planking that is to the floor on the left side, and raised up off the ground the other two walls.  Plus, some yahoo had cut a big hole in the wall that actually went to the floor.   At butt-level.
My goal was simple.  To make this outhouse more like an actual bathroom, and use only materials we already had in the house.  I decided the easiest way to fill in the heiny hole was to use some super thin tongue and groove planks we had laying around from an abandoned project.  I measured, got my materials together (which included wine, and my miter saw) and got to cutting.  
I'm not sure you should drink and use big saws, but I did it and all my digits survived.  Of course nothing happened, check out my concentration.  
The planks needed something to attach to on the bottom, I really didn't have the tools or resources (or patience, time, desire, the list goes on) to attach this 2x4 to the concrete, so it is just resting there with the planks to anchor it down.  
And here are the first few up.  Not bad!
To nail them into the 2x4, I had a very scientific method.  Shaun pushed on it from the other side while I nailed the planks.  When I got to the last one, I used almost the full length of the plank to fill in the entire open area.  
What you see here is a space that wasn't filled with a plank in between the original board and the new plank.  I don't have a table saw to rip these, so I just nailed another full one up to the other side, which is just a paint room and workshop, anyway.  It fills up the hole, you know?  The final step that night was to add a piece of trim to the meeting of 'old and new' and use leftover Behr Aqua Smoke (our master bedroom color) to paint everything.  
Then I hung a mirror I didn't have a place for.  Yay!
And I also hung a little framed photo I already had (seen behind me) and replaced this little gem: 
Oh yeah, previously, you had to turn the light 'on and off' by screwing the lightbulb in and out.  I don't pretend to know the wiring in this house.  I solved the issue by replacing the classic ceramic bare bulb fixture (which is sad, because it is cool) with a globe fixture that has a pull chain on it.  It works!  I'm an electrician!
I painted the inside of the door bright white to mirror the white cinderblock and break up all the aqua.  
And here is the final product!
That little piece holding the TP is on loan from my mom, my aunt made it and I think it's so cute! 
And on the outside, I hung up this little sign I found for $5 on Amazon.  I find it funny because it really is just a toilet inside. 
The outside doesn't look very inviting.....
But the inside isn't so bad!  I cleaned the heck out of that toilet, so I would be happy to take a ladylike pee in here now.  
I don't think I will spend the time to paint all the horrible yellow ductwork and outside of this outhouse, but as long as the inside isn't scary, I'm happy.  I did spend $9 on the light, $4 on the TP holder, $10 (with shipping) on the toilette sign, so I guess I failed at doing this fix up with only materials I had at home.  Oh well, it was worth it! 

Sunday, October 6, 2013

Walkway is finished!

I can't believe we got it done ahead of schedule - one day shy of 3 weeks from start to finish.  It seemed impossible to get the puzzle finished with the stone that we had available, but we got it done. 
We do have a couple of stones in the middle that are a bit higher, but the shape of them was great, so we decided to work with them.  One important thing was making the stones perfectly level with the sidewalk, and the curb.  We did a great job with that!
Once we got halfway through, I stopped using the previous stones as my 'level' guideline, and instead moved the the curb and worked backwards.  This ensured that I was level with the curb, and I could adjust the middle of the walkway to match up with both sides. I was very happy that we got to use this enormous stone I bought, it had a big flat edge to use against the (wrecked) curb.  I was worried they would wait til we had this all done, then rip out the curb for repair...but it appears they don't give a crap! 
It would sure look a lot better if the curb was fixed, but at least my stones match up with the gap.  Once we got everything set, we placed (and leveled) a bunch of small stones into the bigger gaps, and swept in the polymeric sand.  A quick pass with the hose, and we happily called it 'done for now.'  If you haven't used polymeric sand before, it is wonderful!  It dries so hard, you have to chip it out....great for applications like this.  A big bucket from Home Depot was $20.
I got some grass seed down asap, and I'm happy to say that it's already growing!  I was worried it was a little too late in the season to plant it (put it down Sept 29), but luckily the weather has been cooperative.  
We are going to put a bit more sand in the low spots between the stones, and then I'm washing my hands of this project.  Happily, the inspector stopped by and gave us the stamp of approval.  More specifically, he wrote 'Replacement carriage walk is OK.'  Um, it is clearly better than 'OK.'  
This project cost us:
$85 for flagstone
$100 for leveling sand, traffic bond gravel, edgers (and stakes that come with)
$20 for polymeric sand

For about $200 and some physical labor, we got a walkway that fits with our house much better than new concrete.  I am happy!  My only tip for you is to avoid buying anything from Home Depot unless you absolutely have to.  We don't have a truck, so it's not easy for us to run to the stone yard for more sand, gravel, etc.  You will spend WAY more money buying that stuff bagged from Home Depot, always buy in bulk and buy MORE than you think you will need. Sand and gravel is cheap, give any extra away or find another use for it.  Many garden centers carry sand and gravel, too...so find a place to buy in bulk!