Showing posts with label Kitchen. Show all posts

Wednesday, November 14, 2012

Our finished kitchen - 9 months later

It's 9pm, I have a cold, my baby is sleeping, and I should be, too.  But I can't go to bed because I've been meaning to share the official 'after' pics of the kitchen for over a week.  Finally, here is the finished kitchen!  
Here is a before, just for funsies.
We mostly finished it in February and since then we had a baby, realized we hate our appliances, procrastinated on putting up the shelves, and lived without switchplate covers.  
I wouldn't change anything.  Except our KitchenAid appliances, which are crap!  That range is supposed to have a power burner that boils water super fast, but I swear it takes longer than a regular one.  This next picture is the best representation of the paint color, Behr Lotus Leaf.  
Here is a before of the sink wall.  Yikes.  Notice the sweet trash compactor.  Hello, 1980!
Our faucet is so good looking, and it only cost me $85!
The counters are a quartzite called Phantom Green.  It is pretty much black, but the veining is a slightly aqua-tinted white.
We hate this KitchenAid counter-depth refrigerator.  We have had four service calls on this thing (the ice maker, of course) in the first 5 months we owned it.  Unacceptable.  
I can barely remember when the frig wall used to look like this!
The lighting is all from Rejuvenation except for the can lights and under cabinet lights.  
Our gorgeous shelves!  I couldn't be happier with them.  All of our daily white dishes fit perfectly and we use them so quickly there is no way they will get dusty.  Well, maybe the small plates will - who really uses those, anyway?   

We LOVE our Sharp drawer microwave, by the way.  This is the best place for a microwave, in my opinion!  This counter is raised up to 42" to make it easy to use.  The Restoration Hardware Lugarno pulls and knobs on the cabinets make me giggle with glee, they are so shiny and beautiful.  I am not even mad that I had a mental breakdown installing them.     
We spent a lot on this kitchen, but walking into the room and loving what you see is worth it to me.  
Last details - I have to actually make the curtains (right now it's just fabric pinned to the rods) and I'd like to cut the table down to a more reasonable height and get some stools.  
Until then, I'm enjoying walking in the back door and seeing our finished space!
If you have specific questions about stuff in the kitchen, I'm sure a search on the blog would find it for you - but I love getting emails/comments, so send them my way!   

Sunday, November 4, 2012

Renovation Roadtrip Results

Ooo, all the words in my title started with R!  That is how you BLOG, people!  I wanted to show you all what Meryl and Chris did to our house.  Because, rest assured, I didn't do much but act goofy and take pictures.  Anywho, we originally wanted to tackle our sad storage space of a basement, but we realized that was a can of worms we didn't want to open right now.  So, we turned to a few other smaller projects.  One was installing a new storm door on the door to our deck above the garage.  Here it is the first day we saw the place, with the old storm door laying there against the house:
It has been without a storm door for who knows how long, and the bedroom leading out to the deck was always freezing in the winter.  First we ripped out the existing frame from the old door, it was so rusted the screws kind of crumbled out.
When we pulled out the frame, there were holes left in the rubber membrane roof up here, so we had to fill the voids with some GREAT STUFF!
Then Chris was a genius and got some flashing to cover the rotted parts of the door frame.  
Meryl was official direction-reciter.
In no time at all, that door was up!
Mission accomplished.
Now I just need to scrape and paint the main door.  Ew.
The next thing we needed help with, was those blasted kitchen shelves.  
I put another coat of Deft spray lacquer on the shelves....
...while Chris did some surgery to the brackets
A 1/2in glass and tile bit made some dandy holes in the subway tile for the brackets to be attached with toggle bolts, since this side had no stud.
I almost wept with joy when I saw those brackets getting attached.  
How he managed to get them all lined up perfectly is beyond me, I always mess up even though I measure twice and drill once.  
Beautiful!  
Chris was a genius and picked up these screw covers that can be stained and everything.  
I used the matching stain and also sprayed them with the spray lacquer.  
Before:
After:
After the shelves were done, Chris helped us put a vent cover on the open toe-kick vent beneath the cabinet.  That vent used to freeze the floor with A/C in the summer, so I'm happy to have a way to control it.  
He also put all the switch plate covers on the outlets and switches.  We had lots of areas where the tile needed to be notched out.  If I can't just screw it on, I sort of say 'no thanks' and leave it be.  I'm so grateful all these finishing touches are done!
I'm taking photos of the finished kitchen for the official post right now, that will come later this week.  In the meantime, check out Chris and Meryl's post on their Renovation Roadtrip stop at our house here!  
Thanks so much, guys!  

Tuesday, May 8, 2012

Creating a shelf

This area of the kitchen is very naked in anticipation of our open shelves.  Ok, and an outlet cover.  I know, that is silly.  
I finally got on this project over the weekend.  The shelves, not the stupid outlet cover.  Here are the sweet red oak components of one of our two kitchen shelves:
The shelf boards are from a local hardwoods place I found online.   They were able to cut down the oak to the exact measurements I wanted, so I got two oak shelves 42 inches long, 11.5 inches deep, and 1.75 inches thick.  They are so beefy!  I paid $124 for both pieces and couldn't be happier.  Piecing a thick oak shelf together at the local big box store would've been a pain and would not have looked as nice. 
They did need a finish sand before staining.  Especially on the edges....see the difference?
I picked the stain up from our local Hallman Lindsay store.  I thought about painted shelves way back, but I really wanted more warmth in the kitchen, so I went with red oak with a plan to stain to match the floors.  
The American Walnut stain was a near perfect match for the floors, tested here on a scrap piece of flooring.  Fabulous! 
I wanted to only do one coat of stain, and I'm very happy with the color with just one pass.  I didn't let it sit, I just applied and wiped it smooth right away.  
Gorgeous!  The knot on this one will most likely be the top part of the top shelf, so no one will see it.  Although, I don't actually mind it.  
The shelf brackets were really annoying to stain, but I got the job done with the help of some Q-tips for the tight areas.  These four brackets from architecturaldepot.com cost me $125 and can hold 250 pounds.  That's great, considering how heavy the boards are alone!  
The next step is to coat all the pieces with my favorite finish for stained wood, Deft spray lacquer.  I think I will use semi-gloss for this application.  This lacquer is so durable, our dining room table still looks newly refinished a year and a half later.  
We're getting there!

Monday, April 30, 2012

We've got blinds

So, I bought blinds (from Select Blinds) for our kitchen and living room a long time ago.  We kept meaning to put them up, but were much too lazy to actually do it.  We actually did it this weekend, and we are very happy with them.  As happy as you can be about blinds, anyway.  After we figured out how to install them, it was pretty easy.  I would mark the screw holes for the brackets, and Shaun was in charge of drilling and mounting them.    
My job was clearly very important.  I would also take many annoying photos of my husband while he was trying to do this.  
Because our window stops were only an inch wide, we had to center the bracket on them and use the big square holes for the screws.  Is this ideal? I'm not sure, but that is the way it worked.  
Once these were mounted, the blinds snapped in and the magnetic valance simply got stuck on.  Easy!  I do have to mention that all the valance pieces were a quarter inch too short to cover the blind frame, so I will be contacting Select Blinds about it.  Pretty annoying.  
The color I chose for the blinds is Pecan, It's a nice warm color that looks great with our floors.  Blinds are pretty necessary in here, since our neighbors are about 15 feet away and the right window looks directly into our bathroom.  We don't always close the door all the way while in the bathroom, are we the only ones?
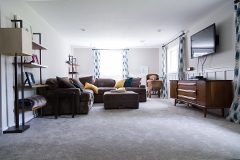
In the living room, the windows have been blindless since we bought the house in 2008.  We never really feel exposed in here being pretty far from the street, but I still wanted the added privacy of blinds to deter possible baby-stealers.  You never know...
The day is cloudy and I have pregnancy brain and can't operate my camera too well these days, so here's the best pic I could come up with for the 'afters'....
We also added some new sash lifts to the windows, we haven't had hardware on these windows since we got them installed in 2010.  I didn't want to pay for Marvin lifts when I could find cheaper ones myself, famous last words until two years later.  I chose these nice, solid brass ones from House of Antique Hardware:
For $25 including shipping, I'm sure we saved at least $75 from what Marvin would charge for the same thing.  I'm so happy these windows are finally complete!
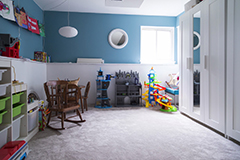
And, here is an exersaucer we put together yesterday.  I think the assembly made Shaun bleed, baby things are serious! 
I guess I should just get used to seeing brightly-colored plastic in my living room....